

How can I define non-horizontal soil layers in DeepEX?
- May 19
- 2 min read
In our DeepEX software, we provide a tool called Custom Layers, which allows you to create nonhorizontal soil layer lines. You can use this tool as follows:
1. Create Horizontal Soil Stratigraphy: Begin by creating a horizontal soil stratigraphy in the borings dialog.

2. Enable Custom Layers: In the General tab of the software, click the small arrow next to the "Custom Layers" button and select the top option to use custom layers. This is a toggle button that allows you to switch between normal horizontal and custom layers.

3. Generate Custom Layer Lines: The first time you use this tool in a specific software file (or whenever you want to reset the custom layers back to horizontal from a newly selected boring), click the second button in the same drop-down menu to generate the custom layer lines from the selected boring.

Once the soil layer lines are accessible, you can hover the mouse over them until they highlight. Doubleclick to add points and modify the X coordinate and elevation of each point. Avoid creating completely vertical lines (points with the same X coordinate but different elevations), and maintain the order of points (X1 < X2, etc.).

4. Draw New Lines: In the Custom Layers drop-down, there is a tool that allows you to draw new lines. Click on points in the model area where you want to add the new custom layer line (always click from left to right), and press "Enter" after the last click. In the dialog that appears, define the soil type below the new line and the exact point coordinates.

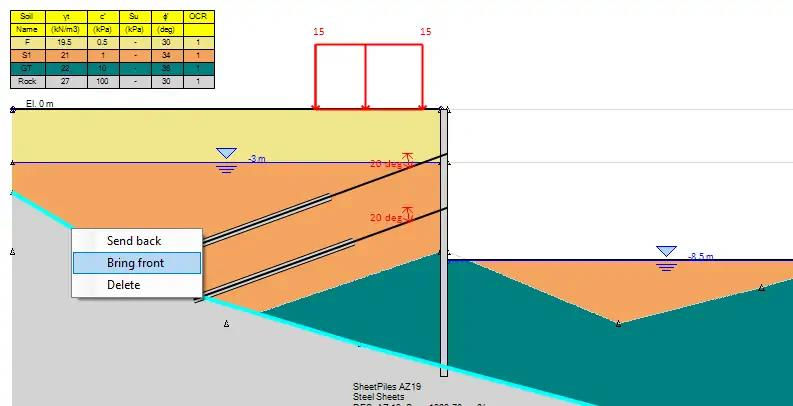
You can then access each layer line by hovering the mouse over it to highlight, right-clicking, and changing the order of appearance on the model area (e.g., Bring to Front, Send to Back, etc.).
Let us show you how to reduce your design time by up to 90%!


